Table of Contents
Heat Pump Thermostat Replacement: What You Need to Know
Replacing your heat pump thermostat can save you money and make your home more comfortable. A heat pump thermostat replacement is often a simple DIY project that most homeowners can handle in about an hour. Modern thermostats offer better temperature control, energy-saving features, and smart home integration that your old thermostat might lack. This guide will walk you through everything you need to know about replacing your heat pump thermostat, from choosing the right model to programming your new device.
Heat pump systems are different from regular heating systems. They need special thermostats that can control both heating and cooling functions. If your thermostat is outdated, not working right, or you want new features, it’s time for a replacement.
Let’s explore how to replace your heat pump thermostat, what to look for in a new one, and how to avoid common mistakes during installation.
Signs You Need a Heat Pump Thermostat Replacement
Before jumping into a replacement project, it’s important to know if you really need a new thermostat. Here are some clear signs it’s time for a heat pump thermostat replacement:
Your Thermostat is Not Responding
If your thermostat screen is blank or doesn’t respond when you press buttons, it might be time for a replacement. Sometimes the problem is just dead batteries, so check that first. But if new batteries don’t fix the issue, your thermostat might be broken.
Your heat pump should turn on when you adjust the temperature. If nothing happens when you change settings, the thermostat might not be sending signals to your system anymore.
Temperature Readings Are Wrong
Does your home feel much hotter or colder than what your thermostat says? Inaccurate temperature readings are a common sign of thermostat failure.
Try using a separate thermometer to check the actual room temperature. If there’s a big difference between that and what your thermostat shows, it might be time for a replacement.
Your Energy Bills Are Rising
Have you noticed your energy bills going up even though your usage hasn’t changed? An inefficient thermostat could be the culprit. Old thermostats often lose their ability to control temperatures precisely.
A new, energy-efficient thermostat can save you up to 10% on heating and cooling costs. Smart thermostats can save even more by learning your schedule and adjusting temperatures automatically.
Your Current Thermostat is Outdated
If you have an old manual thermostat with a dial or slider, you’re missing out on energy-saving features. Modern digital thermostats offer programmable schedules, remote control via smartphone apps, and even learning capabilities.
Upgrading to a newer model can improve your comfort and reduce energy waste. Many new thermostats can even remind you when it’s time to change your air filter.
Choosing the Right Replacement Thermostat for Your Heat Pump
Not all thermostats work with heat pumps. Heat pumps need special thermostats that can control both heating and cooling modes. Here’s what to look for:
Heat Pump Compatibility
Make sure any thermostat you buy specifically states it works with heat pumps. Look for thermostats that mention “heat pump compatible” or have settings for emergency heat and auxiliary heat.
Standard heating/cooling thermostats won’t work properly with heat pumps. They lack the special controls needed for the reversing valve that switches between heating and cooling modes.
Smart vs. Programmable Thermostats
You have two main options for modern thermostats:
Programmable thermostats let you set temperature schedules for different times of day. They’re more affordable than smart models but still offer good energy savings.
Smart thermostats connect to your home’s WiFi. They learn your preferences, adjust automatically, and can be controlled from your phone. Popular brands include Nest, Ecobee, and Honeywell Home.
Smart thermostats cost more upfront but can save more money over time. Many utility companies offer rebates for installing them, which helps offset the cost.
Stages of Heating and Cooling
Heat pumps can have different “stages” of operation:
- Single-stage heat pumps run at full power or not at all
- Two-stage heat pumps have high and low settings
- Variable-speed heat pumps can run at many different levels
Your replacement thermostat must support the same number of stages as your heat pump. Check your heat pump’s manual or model number to find this information.
C-Wire Requirements
Most modern digital thermostats need a C-wire (common wire) to provide constant power. Check behind your current thermostat to see if you have a blue or black wire connected to a terminal labeled “C.”
If you don’t have a C-wire, you have three options:
- Choose a thermostat that doesn’t require a C-wire
- Install a C-wire adapter kit
- Hire a professional to run a new C-wire
Some thermostats come with adapters that can work without a C-wire, but they may not function as reliably.
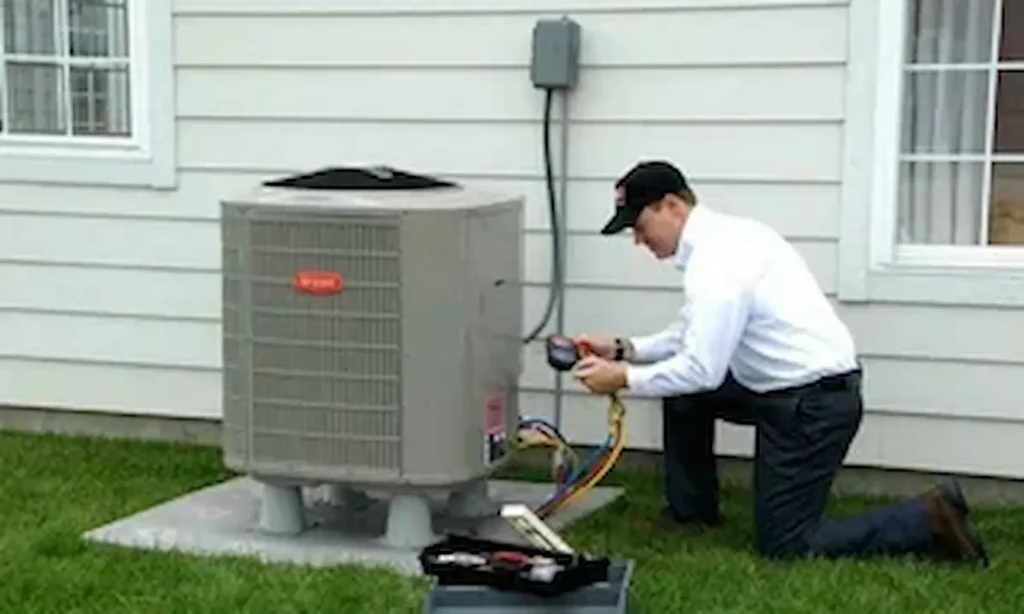
Step-by-Step Heat Pump Thermostat Replacement Guide
Ready to replace your thermostat? Follow these steps for a successful heat pump thermostat replacement:
Safety First: Turn Off Power
Before touching any wires, turn off power to your heat pump system. Go to your circuit breaker panel and switch off the breakers for both your heat pump and air handler.
Test that the power is off by trying to turn on your current thermostat. If nothing happens, it’s safe to proceed.
Remove the Old Thermostat
Take off the cover of your old thermostat. Most snap off or have a release button at the bottom.
Before disconnecting any wires, take a clear photo of the current wiring. This will be your reference if you get confused later.
Label each wire with the letter of the terminal it’s connected to. Most replacement thermostats come with small stickers for this purpose. Common terminals include:
- R or Rh (power for heating)
- Rc (power for cooling)
- G (fan)
- Y (cooling)
- W or W1 (heating)
- O/B (reversing valve)
- C (common wire)
Unscrew the terminal screws and remove each wire carefully. Then unscrew the mounting plate from the wall.
Install the New Mounting Plate
Position the new mounting plate where the old one was. Use a level to make sure it’s straight.
Mark the screw holes with a pencil. If the new holes don’t line up with the old ones, you may need to drill new holes.
If there’s a large hole in the wall from the old wires, use the mounting plate to cover it. Some thermostats come with a backing plate for this purpose.
Screw the mounting plate to the wall using the screws provided with your new thermostat.
Connect the Wires
Pull the labeled wires through the opening in the mounting plate.
Connect each wire to the matching terminal on the new thermostat base. Remove the label as you connect each wire.
Make sure the wire ends are straight and no copper is exposed outside the terminals. Tighten each terminal screw securely.
If your new thermostat has different terminal labels than your old one, check the manual for a wiring conversion chart.
Attach the Thermostat and Restore Power
If your new thermostat uses batteries, install them now.
Carefully snap the thermostat onto the mounting plate. Make sure it clicks into place securely.
Go back to your circuit breaker panel and turn the power back on to your heat pump system.
Program Your New Thermostat
Follow the manufacturer’s instructions to set up your new thermostat. This usually includes:
- Setting the current time and date
- Selecting your system type (heat pump)
- Setting your preferred heating and cooling temperatures
- Programming your daily schedule
For smart thermostats, you’ll need to connect to your home WiFi network and download the companion app to your smartphone.
Testing Your New Heat Pump Thermostat
After installation, it’s important to test all functions of your new thermostat:
Check Heating Mode
Set the thermostat to “Heat” mode and raise the temperature setting 5 degrees above the current room temperature.
Your heat pump should turn on within a minute. Feel the air coming from your vents – it should be warm.
Let the system run for about 15 minutes to make sure it’s working properly and then return the temperature to normal.
Check Cooling Mode
Set the thermostat to “Cool” mode and lower the temperature setting 5 degrees below the current room temperature.
Your heat pump should switch to cooling mode. The air from your vents should feel cool after a few minutes.
Again, let it run for about 15 minutes before returning to your normal setting.
Test the Fan
Set the fan to “On” instead of “Auto.” The fan should run continuously, even if heating or cooling isn’t running.
Switch back to “Auto” and the fan should only run when the system is heating or cooling.
Check Emergency Heat (if applicable)
If you live in a cold climate, your heat pump likely has emergency or auxiliary heat. Set the thermostat to “Emergency Heat” mode and raise the temperature.
The backup heating system should turn on. This might be electric resistance heating or a gas furnace, depending on your system.
Troubleshooting Common Heat Pump Thermostat Replacement Issues
Even with careful installation, you might encounter some problems. Here are solutions to common issues:
Thermostat Has No Power
If your new thermostat won’t turn on:
- Check that the circuit breaker is on
- Make sure batteries are installed correctly (if applicable)
- Verify that the R wire is connected properly
- Check for a blown fuse in your air handler
If you’re using a C-wire adapter, make sure it’s installed according to the instructions.
System Won’t Turn On
If your heat pump doesn’t respond to the thermostat:
- Make sure the thermostat is set to “Heat” or “Cool” (not “Off”)
- Check that all wires are connected to the correct terminals
- Verify that the temperature setting is calling for heating or cooling
- Look for loose connections at the thermostat and air handler
Sometimes the safety switch on your air handler door can prevent the system from running if the door isn’t fully closed.
Heating Comes On When Cooling is Selected
This usually means the reversing valve wire (O/B) is connected incorrectly or the thermostat is set to the wrong reversing valve position.
Check your heat pump manufacturer’s specifications to see if your reversing valve is energized in heating mode (B) or cooling mode (O). Then set your thermostat accordingly in the installer settings.
Temperature Reading is Incorrect
If your thermostat shows the wrong temperature:
- Make sure it’s not in direct sunlight or near a heat source
- Check for drafts coming through the wall opening
- Look for a temperature calibration setting in the thermostat menu
Some thermostats need 24 hours to accurately calibrate to your home’s temperature.
Frequently Asked Questions About Heat Pump Thermostat Replacement
How much does it cost to replace a heat pump thermostat?
DIY heat pump thermostat replacement costs between $50 and $300 for the thermostat itself. Basic programmable thermostats start around $50, while advanced smart thermostats can cost $200-$300.
Professional installation typically adds $100-$200 to the cost. Many utility companies offer rebates of $50-$100 for installing energy-efficient thermostats, which can offset some of the cost.
Can I replace my heat pump thermostat myself?
Yes, most homeowners with basic DIY skills can replace a heat pump thermostat. The process typically takes 30-60 minutes. The most important part is correctly identifying and connecting the wires.
If you’re uncomfortable working with electrical wiring or if your system has complex wiring, it’s best to hire a professional.
Will any thermostat work with a heat pump?
No, not all thermostats are compatible with heat pumps. You need a thermostat specifically designed for heat pump systems. These thermostats have special settings for the reversing valve and emergency heat functions.
Always check the packaging or product description to confirm heat pump compatibility before purchasing.
Do I need a special thermostat for a dual fuel heat pump?
Yes, dual fuel systems (heat pump with gas furnace backup) require a thermostat that can control both systems and switch between them at the optimal temperature. Look for thermostats that specifically mention dual fuel or hybrid system compatibility.
These specialized thermostats know when to switch from the heat pump to the gas furnace based on outdoor temperature and efficiency.
How often should I replace my heat pump thermostat?
Most thermostats last 10-15 years. Consider replacing yours if it’s not working properly, if you want better energy-saving features, or if it’s more than 10 years old.
Technology improves quickly, so even a 5-year-old thermostat might lack features that could save you money and improve comfort.
Will a new thermostat save me money?
Yes, replacing an old manual thermostat with a programmable or smart model can save 10-15% on heating and cooling costs. Smart thermostats that learn your schedule and adjust automatically typically save the most.
The exact savings depend on your previous thermostat, your climate, and how you program the new one. Most homeowners recoup the cost within 1-2 years through energy savings.
Enhance Your Home Comfort with Professional Heat Pump Thermostat Replacement
Replacing your heat pump thermostat is a simple upgrade that can make a big difference in your home’s comfort and energy efficiency. While many homeowners can handle this project themselves, professional installation ensures everything is connected correctly for optimal performance.
If you’re ready to upgrade your heat pump thermostat but don’t want to tackle it yourself, Accurate Comfort HVAC can help. Our experienced technicians can recommend the best thermostat for your specific heat pump system and install it properly the first time.
Contact Accurate Comfort HVAC today to schedule your heat pump thermostat replacement. We’ll help you choose the right model for your needs and ensure your system runs efficiently all year long. Your comfort is our priority!